


Table of contents
Workflow
---
config:
  theme: neutral
  layout: elk
---
graph TD
    download([Download the script to your working directory]) --> data(Creat input folder in the same directory)
    data --> run((Run command in terminal))
    run --> output[Processing]
    output --> csv[Raw Data in CSV]
    output --> quality[Quality Report in HTML]
    output --> log[Log]
    output --> outlier[Outlier Report in HTML]
    output --> table[Outlier Table in HTML]
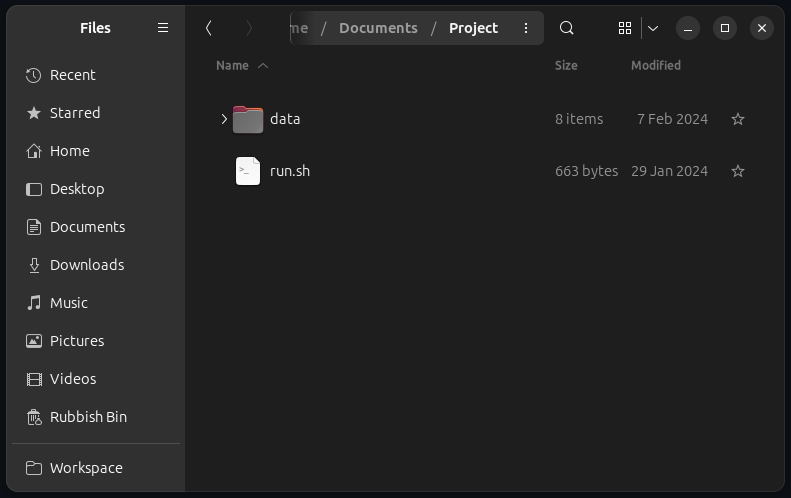
Before executing the command, the working directory should look like this:
The script might need to be granted execute permission
chmod +x *.sh
Use Cases
Note: If there is any space along the filepath, wrap it with double quotes and escape the space.
Please refer to the example below: e.g. input folder isdata/iris folder/./run.sh --input "data/iris\ folder/" --mode iris
Validate Installation or Benchmarking
If you want to validate your setup or benchmark your deployment machine:
./run.sh --benchmarking # you can specify modality (face, iris, finger) just like regular run too.
Analyze Iris Images
If all the iris images are organised under the ‘data/input’ folder, the tool can be run in iris mode with the following command:
./run.sh --input data/input/ --mode iris
Match Filename Pattern
Should the fingerprint files follow a naming convention containing the text ‘finger’, such as finger_1.jpg or X_finger.png, they can be located and analysed using:
./run.sh --input data/input/ --mode iris --filename "*FINGER*"
Match Specific File Formats
If the input folder contains files in various formats and you want to focus on specific formats, the files can be identified and processed with this command:
./run.sh --input data/input/ --mode iris --type "jp2,bmp"
Pre-processing before Analyzing
Before initiating the fingerprint scanning process, the file format may need to be converted. Use the following command to convert files of JP2 and JPEG to PNG (the default target format):
./run.sh --input data/input/ --mode fingerprint --convert "jp2,jpeg"
If there is specific requirement for the file format, the following command can be used to specify the target format, for example, WSQ:
All the pre-processing processes are temporary only for the following analysis task, it will not modify the input file, and won’t be kept after the analysis.
./run.sh --input data/input/ --mode fingerprint --target wsq
Find Outliers using Filter
When a filter is applied, there is going to be 2 extra outputs, a quality report on the outliers filtered and a page for you to view these samples.
Get output of finderprint samples with NFIQ2 score larger than 60:
./run.sh --input data/input/ --mode finger --query "NFIQ2>60"
Provide output CSV from previous run and apply filter:
./run.sh --mode filter --input data/output.csv --query "NFIQ2<40"
Selected columns and apply filter query to them:
./run.sh --mode filter --input data/output.csv --columns "NFIQ2,edge_std" --query "NFIQ2<40"
Select Alternative Face Analysis Engines
Currently, BQAT support 3 analysis engines for face modality:
- BQAT by Biometix (default)
- OFIQ from BSI (beta)
- BIQT from MITRE
./run.sh --mode face --input data/input/ --engine ofiq
Preprocessing Mode
You can feed a dataset to BQAT and preprocess the images for later analysis.
The following example shows how you can send the folder data/input/ in, and:
- Convert the images to PNG format
- Convert color mode to RGB
- Resize the images by percentage (30% in this case)
./run.sh -M preprocess -I data/input/ --config png,0.3,rgb
And of course you could configured it to do single preprocess at a time.
# convert images to BMP
./run.sh -M preprocess -I data/input/ --config bmp

# convert images to grayscale
./run.sh -M preprocess -I data/input/ --config grayscale

# resize images by width (300px in this case, height will be inferred accordingly, aspect ratio maintained)
./run.sh -M preprocess -I data/input/ --config 300
In terms of resizing configuration, number smaller than 10 will be treated as percentage/magnification, for instance, 3.7 will be 370%, while 128, which is greater than 10, will be 128 in width.
Miscellaneous
If you just want to get the raw CSV output, you may disable reporting feature:
./run.sh --input data/input/ --mode iris --reporting no
Process samples in /input, but limit to first 100k files:
./run.sh --input data/input/ --mode face --limit 100000
Generate EDA report directly from existing CSV:
./run.sh --input data/results.csv --mode report
Update BQAT-CLI (pull the latest container):
./run.sh --update
Option Flags
| Short | Long | Description |
|---|---|---|
-M | --mode | (REQUIRED) Specify BQAT running mode (fingerprint, face, iris, speech, filter, report, preprocessing). |
-I | --input | (REQUIRED) Specify input directory or CSV file for analysis. |
-O | --output | (OPTIONAL) Specify output directory. |
-R | --reporting | (OPTIONAL) Switch on/off EDA report generation (true, false). |
-E | --engine | (OPTIONAL) Select alternative face analysis engine (bqat, ofiq, biqt). |
-B | --benchmarking | (OPTIONAL) Run system benchmarking analysis. |
-L | --limit | (OPTIONAL) Set a limit for number of files to process. |
-F | --filename | (OPTIONAL) Specify filename pattern for searching in the folder. |
| NA | --type | (OPTIONAL) Specify file types to process in the input folder. |
-C | --convert | (OPTIONAL) Specify file types to convert before processing. |
-T | --target | (OPTIONAL) Specify target type to convert to. |
-A | --arm | (OPTIONAL) Disable multithreading (For ARM64 platform) |
| NA | --columns | (OPTIONAL) Select columns to investigate |
-Q | --query | (OPTIONAL) Queries to apply on the columns |
-W | --cwd | (OPTIONAL) Specify current working directory for url in the report |
| NA | --config | (OPTIONAL) Configure preprocessing task ([target format],[target width],[color mode (grayscale, rgb)]”). |
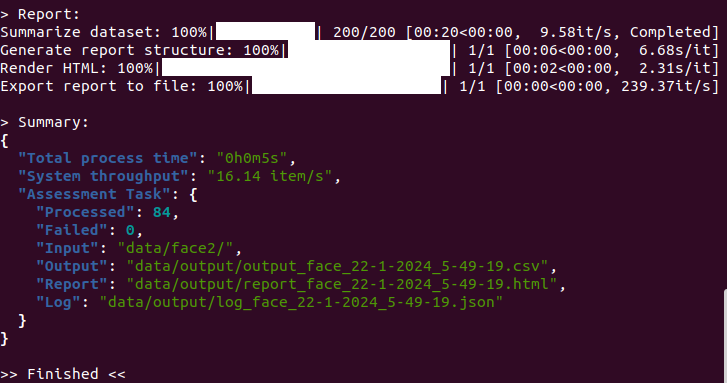
Output Example
Terminal Window
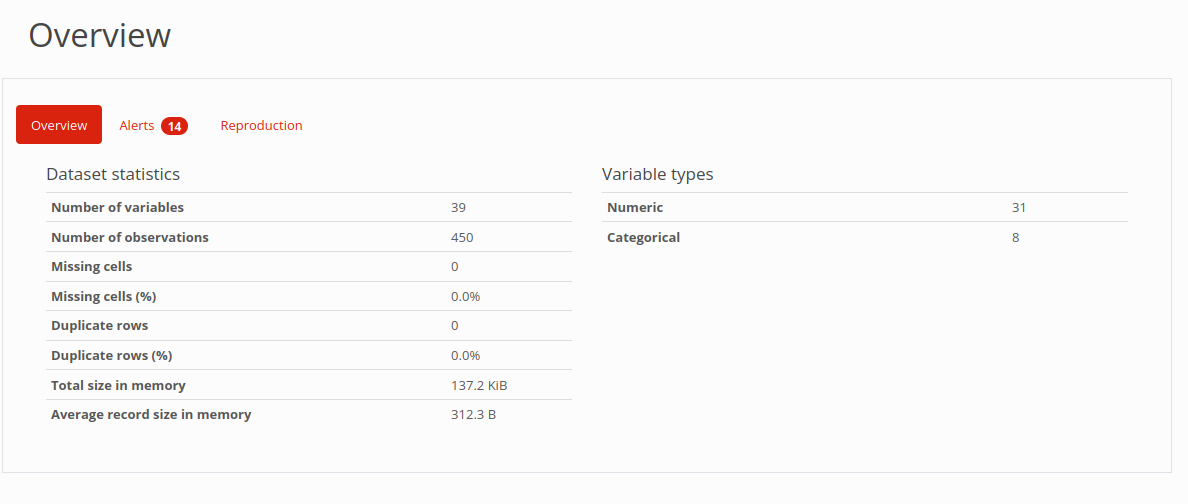
Quality Report
Result Overview
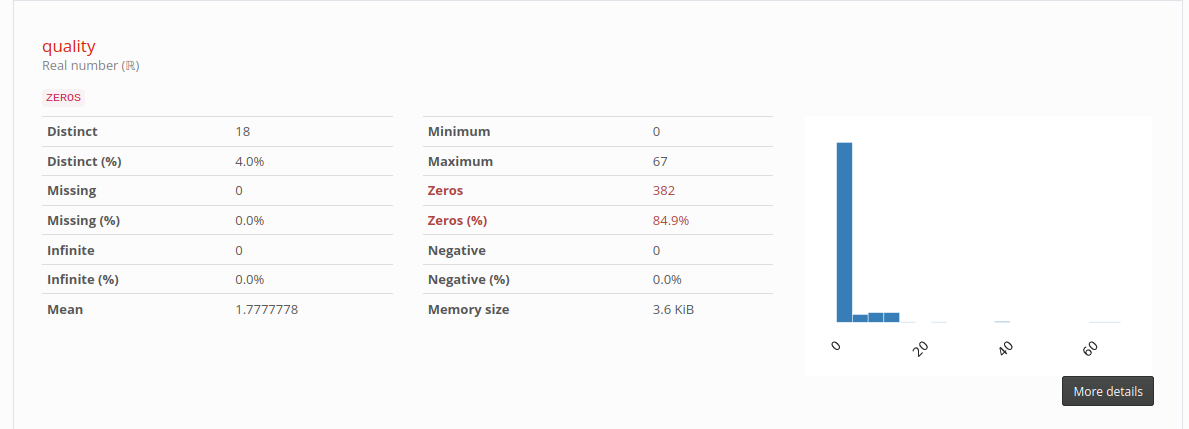
Statistics of column quality
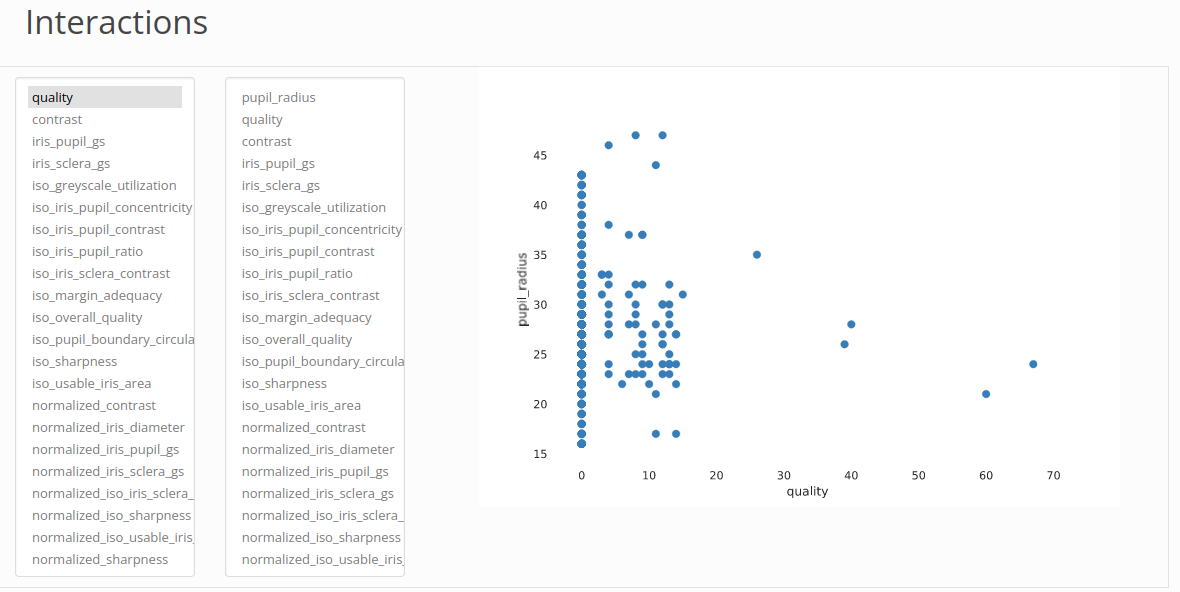
Cross Analysis
Filter for Outliers
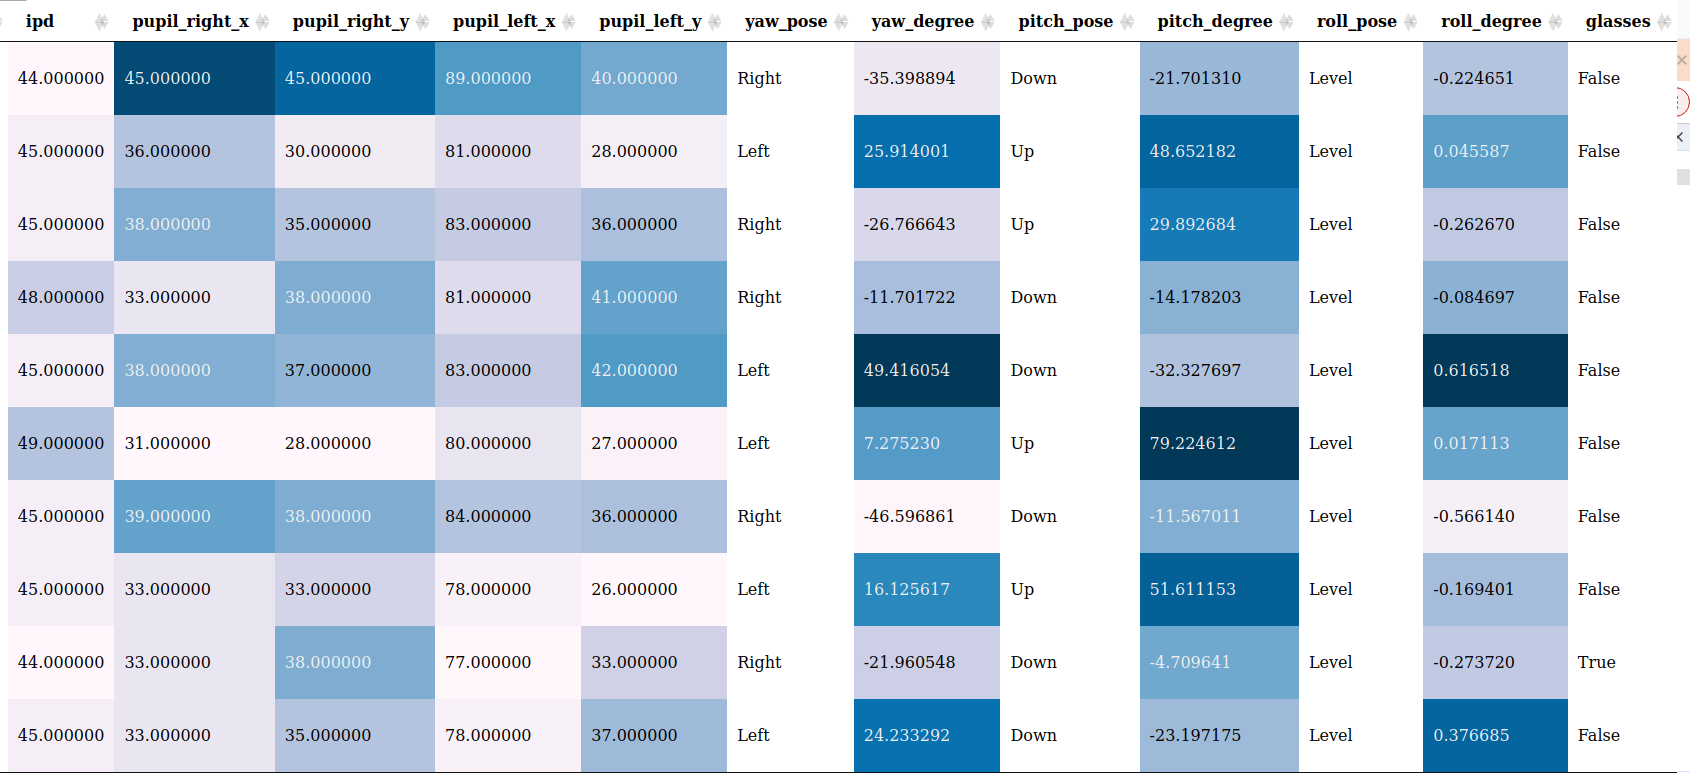
Tabulation of Outliers
You can click on it to view the origin file (need to be open in the working directory):
Log
The log file will keep a record of information during the analysis process, including errors, warnings, and other metadata of the task.
{
  "metadata": {
        "version": "BQAT v1.3.0 beta",
        "datetime": "2024-00-00 00:59:59.984337",
        "input directory": "data/finger/",
        "processed": 208,
        "failed": 0,
        "log": 17,
        "process time": "0h0m28s"
    },
  "log": [
    {
      "nfiq2": "Error: NFIQ2 computeQualityScore returned an error code: Could not create feature set from raw data: FRFXLL_ERR_FB_TOO_SMALL_AREA: Fingerprint area is too small. Most likely this is because the tip of the finger is presented.",
      "file": "data/finger/00001052_plain_500_10.png"
    },
    {
      "convert": "jp2 -> png",
      "file": "data/finger/solid_0_801x1000.jp2"
    },
    {
      "nfiq2": "Error: NFIQ2 computeQualityScore returned an error code: Width is too large after trimming whitespace. WxH: 801x1000, but maximum width is 800",
      "file": "data/finger/solid_0_801x1000.jp2"
    },
    {
      "convert": "jp2 -> png",
      "file": "data/finger/solid_0_800x1001.jp2"
    },
    {
      "nfiq2": "Error: NFIQ2 computeQualityScore returned an error code: Height is too large after trimming whitespace. WxH: 800x1001, but maximum height is 1000",
      "file": "data/finger/solid_0_800x1001.jp2"
    },
  ]
}